Build PhysioLabXR
In this guide, you will learn how to build PhysioLabXR from source code. You can build PhysioLabXR on Windows, MacOS, and Linux.
Windows
How to build an executable
Use auto-py-to-exe library to build the executable
Install:
pip install auto-py-to-exeRun:
auto-py-to-exeOnce run, the following looking window will be opened.

Import the following build configuration. You can Specify the root path of your project and download the file here
{
 "version": "auto-py-to-exe-configuration_v1",
 "pyinstallerOptions": [
  {
   "optionDest": "noconfirm",
   "value": true
  },
  {
   "optionDest": "filenames",
   "value": "<Your/Project/Root/Path>/physiolabxr/PhysioLabXR.py"
  },
  {
   "optionDest": "onefile",
   "value": false
  },
  {
   "optionDest": "console",
   "value": true
  },
  {
   "optionDest": "ascii",
   "value": false
  },
  {
   "optionDest": "clean_build",
   "value": false
  },
  {
   "optionDest": "strip",
   "value": false
  },
  {
   "optionDest": "noupx",
   "value": false
  },
  {
   "optionDest": "disable_windowed_traceback",
   "value": false
  },
  {
   "optionDest": "embed_manifest",
   "value": true
  },
  {
   "optionDest": "uac_admin",
   "value": false
  },
  {
   "optionDest": "uac_uiaccess",
   "value": false
  },
  {
   "optionDest": "win_private_assemblies",
   "value": false
  },
  {
   "optionDest": "win_no_prefer_redirects",
   "value": false
  },
  {
   "optionDest": "bootloader_ignore_signals",
   "value": false
  },
  {
   "optionDest": "argv_emulation",
   "value": false
  },
  {
   "optionDest": "datas",
   "value": "<Your/Project/Root/Path>/physiolabxr/scripting:physiolabxr/scripting/"
  },
  {
   "optionDest": "datas",
   "value": "<Your/Project/Root/Path>/physiolabxr/_media:physiolabxr/_media/"
  },
  {
   "optionDest": "datas",
   "value": "<Your/Project/Root/Path>/physiolabxr/presets:physiolabxr/_presets/"
  },
  {
   "optionDest": "pathex",
   "value": "<Your/Project/Root/Path>/physiolabxr/arduino"
  },
  {
   "optionDest": "pathex",
   "value": "<Your/Project/Root/Path>/physiolabxr/deprecated"
  },
  {
   "optionDest": "pathex",
   "value": "<Your/Project/Root/Path>/physiolabxr/examples"
  },
  {
   "optionDest": "pathex",
   "value": "<Your/Project/Root/Path>/physiolabxr/interfaces"
  },
  {
   "optionDest": "pathex",
   "value": "<Your/Project/Root/Path>/physiolabxr/scripting"
  },
  {
   "optionDest": "pathex",
   "value": "<Your/Project/Root/Path>/physiolabxr/sub_process"
  },
  {
   "optionDest": "pathex",
   "value": "<Your/Project/Root/Path>/physiolabxr/threadings"
  },
  {
   "optionDest": "pathex",
   "value": "<Your/Project/Root/Path>/physiolabxr/_ui"
  },
  {
   "optionDest": "pathex",
   "value": "<Your/Project/Root/Path>/physiolabxr/utils"
  },
  {
   "optionDest": "pathex",
   "value": "<Your/Project/Root/Path>/physiolabxr"
  },
  {
   "optionDest": "datas",
   "value": "<Your/Project/Root/Path>/physiolabxr/_ui:physiolabxr/_ui/"
  }
 ],
 "nonPyinstallerOptions": {
  "increaseRecursionLimit": true,
  "manualArguments": ""
 }
}
Select appropriate output directory and script location, and click on the “Convert .Py to Exe” button.
Check if the executable has been created successfully in the desired location.
How to run the executable
Your root directory structure will look like this after a successful build.
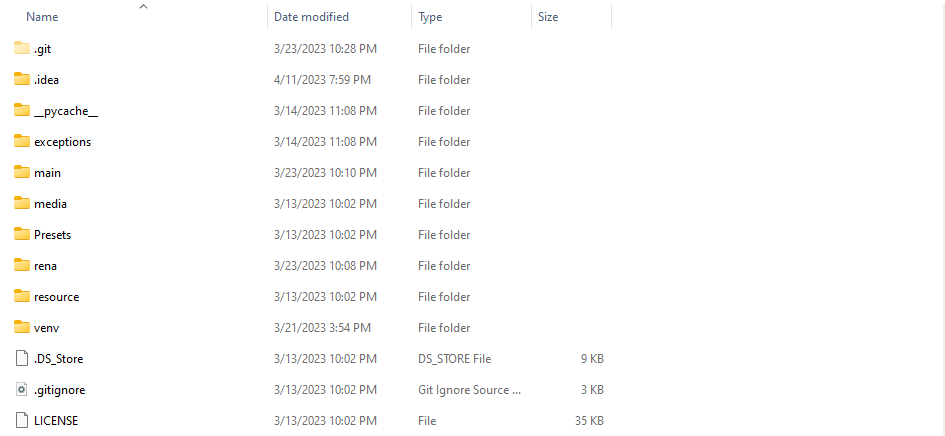
Go into the target build directory. Click on the circled icon in the following image to run the executable.
The executable is named “main” in this example, but it will have different names if you chose different name options as you were building the executable.

MacOS
How to build an executable
Use pyinstaller library to build the executable
There is a known issue with pyinstaller on MacOS working with
PyQt >= 6.5. See details about this issue here. To build the app on MacOS, you will need to install pyinstaller from a develop version of pyinstaller. To do so, run the following command in your terminal.
PYINSTALLER_COMPILE_BOOTLOADER=1 pip install git+https://github.com/pyinstaller/pyinstaller.git@develop
2. Complete the following command by typing in the input box with . Then run this command in terminal at the root directory of your project.
pyinstaller --noconfirm --onedir --console --add-data "ROOT_PATH/physiolabxr/scripting:physiolabxr/scripting/" --add-data "ROOT_PATH/physiolabxr/_media:physiolabxr/_media/" --add-data "ROOT_PATH/physiolabxr/_presets:physiolabxr/_presets/" --paths "ROOT_PATH/physiolabxr/arduino" --paths "ROOT_PATH/physiolabxr/deprecated" --paths "ROOT_PATH/physiolabxr/examples" --paths "ROOT_PATH/physiolabxr/interfaces" --paths "ROOT_PATH/physiolabxr/scripting" --paths "ROOT_PATH/physiolabxr/sub_process" --paths "ROOT_PATH/physiolabxr/threadings" --paths "ROOT_PATH/physiolabxr/_ui" --paths "ROOT_PATH/physiolabxr/utils" --paths "ROOT_PATH/physiolabxr" --add-data "ROOT_PATH/physiolabxr/_ui:physiolabxr/_ui/" "ROOT_PATH/physiolabxr/PhysioLabXR.py"
Once run, a build and a disk folder will be generated in the root path. The stand alone app is in the disk/PhysioLabXR folder.